CapCut is an impressive tool that enables you to create stunning videos with ease. To make the most of this powerful application, you should explore its variety of features and user-friendly interface. This post will provide you with practical tips to optimize your editing process, enhance your creative choices, and efficiently produce captivating content. By the end of this guide, you’ll be equipped with the knowledge to elevate your video editing skills and impress your audience!
Key Takeaways:
- Interface Familiarity: Spend time exploring CapCut Pro’s layout to improve editing speed and efficiency.
- Advanced Features: Utilize tools like advanced filters and audio editing to enhance video quality and creativity.
- Shortcuts & Templates: Leverage keyboard shortcuts and pre-made templates to streamline your workflow and save time.
Getting Started with CapCut Pro
While submerging into CapCut Pro can be exciting, it’s crucial to understand the basics to maximize your editing experience. Familiarizing yourself with the interface and its features will set the foundation for your projects. You’ll appreciate the array of tools and effects designed to enhance your video editing journey, making your workflow smoother and more efficient.
How to Install CapCut Pro
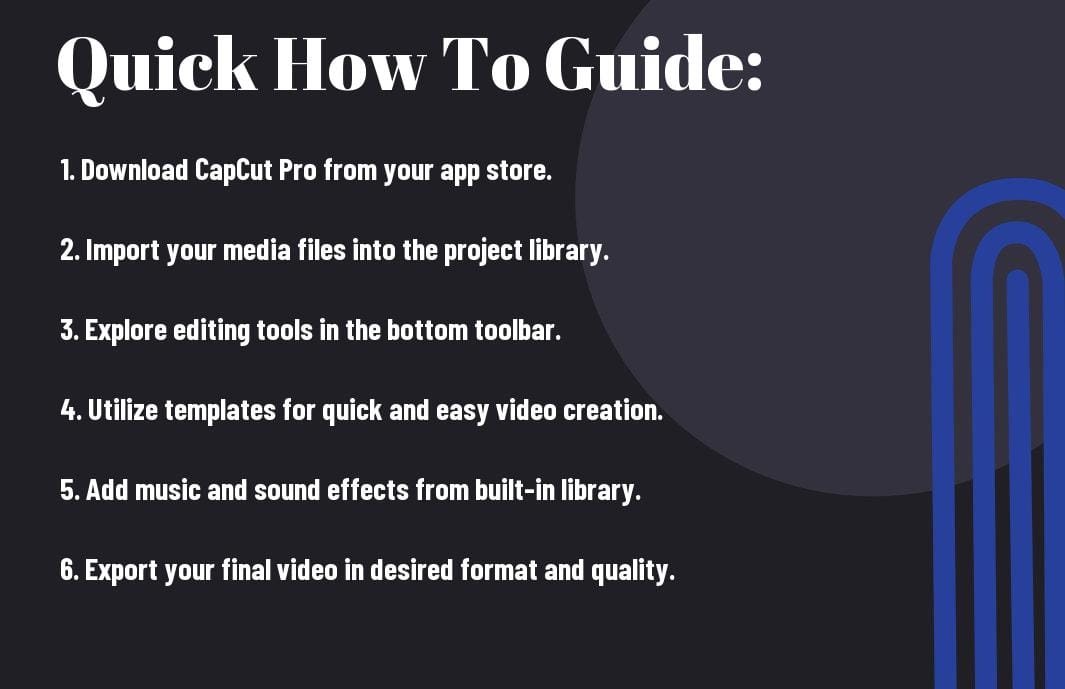
Any user looking to explore video editing can easily install CapCut Pro from the appropriate app store on their device. Once you find the app, click the install button and follow the onscreen prompts. In just a few moments, you will have access to a professional editing suite at your fingertips.
Tips for Setting Up Your Workspace
One effective way to optimize your experience in CapCut Pro is by organizing your workspace. This involves arranging your timeline, toolbars, and media libraries for efficient navigation. Here are a few key tips:
- Customize your toolbar with your frequently used tools.
- Organize your media files into folders for easy access.
- Utilize shortcuts to improve your editing speed.
Knowing how to efficiently set up your space will enhance your editing process.
With a well-organized workspace in CapCut Pro, you will find it easier to focus on your creative endeavors. Keep in mind that your editing environment can significantly affect your productivity. Consider these pointers:
- Adjust your screen layout to minimize distractions.
- Use a clean background for better concentration.
- Ensure good lighting to avoid eye strain during long sessions.
Knowing how to create a conducive workspace will greatly influence your editing results.
Essential Features for Effective Editing
Now, understanding the imperative features of CapCut Pro can significantly enhance your editing experience. The intuitive interface and powerful tools allow you to craft visually appealing videos with ease. Key functionalities include multi-layer editing, an extensive library of clips, and real-time previews, enabling you to see your changes in action. By mastering these features, you can elevate your content creation skills and produce polished videos that engage your audience.
How to Use Advanced Editing Tools
Tools such as CapCut Pro’s advanced editing capabilities can transform your footage into a professional masterpiece. To utilize these tools effectively, follow these steps:
Steps to Use Advanced Editing Tools
| Step | Description |
|---|---|
| 1 | Import your media files into the timeline. |
| 2 | Select the clip and access advanced tools like speed adjustment and keyframing. |
| 3 | Apply effects and transitions to enhance visual storytelling. |
Tips for Incorporating Transitions and Effects
Assuming you want to add depth to your videos, integrating transitions and effects can make a significant impact. When doing so, consider these key techniques:
- Choose transitions that match your content’s style.
- Maintain consistency in effects for a polished look.
- Be mindful of timing to avoid distracting your audience.
Perceiving how well transitions flow can help create a seamless viewing experience for your audience.
Transitions can add a special flair to your editing style, but it’s imperative to use them wisely. To ensure your transitions enhance rather than detract from your narrative:
- Use fade transitions for emotional scenes.
- Opt for zoom effects to highlight critical moments.
- Limit the number of effects to maintain focus on your message.
Perceiving the impact of your choices will lead to more engaging and meaningful content.
Enhancing Your Videos
After you’ve captured great footage, the next step is enhancing your videos to make them stand out. CapCut Pro offers powerful tools that allow you to add various elements such as sound, color, and effects, transforming your raw clips into polished pieces of art. By utilizing these features, you create visually stunning videos that resonate with your audience and elevate your content to a professional level.
How to Add Music and Sound Effects
Videos come to life with the right music and sound effects. To add audio, navigate to the audio library within CapCut Pro, where you’ll find a wide range of licensed tracks and sound effects. Simply select your desired audio, sync it with your clips, and adjust the volume levels to ensure a perfect balance. By carefully choosing your audio, you enhance emotional engagement and overall impact.
Tips for Color Grading and Filters
One key to making your videos visually striking lies in effective color grading and filters. Start by experimenting with different presets and adjustments to find the best mood for your footage. Focus on aspects like saturation and contrast, and remember to maintain consistency throughout your clips. Utilize filters to establish a particular style, giving your videos a signature look. Here are some handy tips:
- Explore diverse presets for instant enhancement.
- Adjust saturation to boost your visuals.
- Maintain contrast for depth and clarity.
Any adjustments you make can significantly influence how your audience perceives your content.
Understanding the interplay of color grading and filters is crucial for achieving a polished look. When you use color wheels and curves, tweak shadows, mid-tones, and highlights to achieve the desired effect. Look for color harmony to enhance mood and coherence. Additionally, always preview your changes to assess their impact on the overall aesthetic. Any changes can dramatically alter the viewer’s experience and connection to your video.
- Prioritize color harmony in your shots.
- Use color wheels for nuanced adjustments.
- Preview changes to gauge effectiveness.
Any shift in color can evoke different emotions and messages in your audience.
Exporting Your Projects
Many users find exporting their projects in CapCut Pro to be an crucial step in the editing process. Once you finish editing, it’s vital to ensure your video is exported correctly to maintain the desired quality while also being suitable for various platforms, whether it’s for social media or personal archives.
How to Export and Share Videos
Now that your video is ready, exporting is a straightforward process. Simply tap on the export button, choose your desired resolution and format, then hit ‘Export’. Once the video is processed, you can easily share it directly to your preferred social media platforms or save it to your device.
Factors to Consider for Quality Output
Exporting effectively means considering different factors that affect the output quality of your video. You should take into account the video resolution, frame rate, and the file format you choose, as these aspects can significantly impact your video’s overall look. Also, make sure to optimize for the platform you’re sharing on to enhance viewer experience. After you finalize your settings, you can expect a high-quality output.
Consider the following points when exporting for the best results:
- Video resolution: Higher resolutions yield better visuals, especially for larger screens.
- Frame rate: Select a consistent frame rate that suits your video type for smooth playback.
- File format: Choose formats like MP4 for compatibility across various platforms.
After assessing these factors, you can optimize your video for its intended use.
Troubleshooting Common Issues
Keep in mind that even experienced users encounter obstacles while editing. Issues such as lagging, file compatibility, or sudden crashes can arise in CapCut Pro. When these problems occur, take a deep breath and evaluate your current editing setup. Sometimes, simple adjustments can restore functionality and improve your editing experience.
How to Fix Common Editing Problems
Even minor tweaks can resolve common editing issues in CapCut Pro. If you find that your video is not responding, try restarting the app or clearing its cache. For audio sync problems, recheck your timeline to ensure clips are aligned correctly. Following these steps can help streamline your editing process.
Tips for Optimizing Performance
With effective performance optimization, you can enhance your editing workflow. To ensure that CapCut Pro functions smoothly, consider performing the following actions:
- Close any unnecessary apps running in the background to free up memory.
- Regularly update the software to benefit from improvements and fixes.
- Use a device with recommended specifications to maximize performance.
Recognizing the importance of these strategies can significantly enhance your productivity while editing.
To fully optimize your performance in CapCut Pro, you should take further proactive measures. Ensure that your device has sufficient storage space, as low storage capacity can hinder app performance. Regularly saving your work will prevent losses and allow you to backtrack without issues. Additionally, utilizing proxy files can improve playback speed during editing. This way, you can work more efficiently and focus on your creativity. Recognizing these practices will elevate your overall editing experience.
Advanced Techniques for Professionals
Unlike basic editing tools, CapCut Pro offers a wide array of advanced features that can significantly elevate your video production quality. Mastering these techniques can set you apart in a competitive field.
Advanced Features Overview
| Feature | Description |
| Keyframes | For intricate animations and transitions. |
| Multi-Layer Edits | Combining multiple clips seamlessly. |
| Audio Sync | Aligning sound with visual content. |
How to Use Keyframes for Dynamic Edits
Advanced keyframing techniques allow you to create dynamic edits that can significantly enhance your visual storytelling. By adjusting properties like position, scale, and opacity over time, you can produce stunning effects that engage your audience and add depth to your narrative.
Tips for Working with Multi-Layer Edits
Professionals can maximize their efficiency when working with multi-layer edits in CapCut Pro. Utilize the following tips to create polished projects:
- Organize your layers for easy navigation.
- Adjust opacity to blend clips seamlessly.
- Use color grading to maintain a consistent look.
Understanding how to effectively manage and manipulate multiple layers will allow you to create more complex compositions. Utilizing these strategies can make your editing process smoother. Recognizing the potential of multi-layer edits will help you craft visually stunning videos that stand out.
To build on your skills with multi-layer edits, keep these additional considerations in mind:
- Layer order impacts visibility and effects.
- Grouping layers can simplify your workflow.
- Preview your edits frequently to catch issues early.
Recognizing the importance of these elements in your editing process can enhance the overall quality of your projects and improve your editing capabilities.
To wrap up
Ultimately, mastering CapCut Pro comes down to understanding its features and applying practical insights to enhance your video editing skills. By experimenting with transitions, overlays, and audio elements, you can elevate your projects to a professional standard. Take your time to explore each tool, stay updated with new releases, and don’t hesitate to tap into online resources for continuous learning. With these strategies, you’ll be well-equipped to create captivating videos that resonate with your audience.