You can transform your editing experience with a few key strategies that make your Filmora projects not just good, but exceptional. By implementing these vital tips, you’ll enhance efficiency, streamline your workflow, and ultimately produce high-quality videos that impress your audience. It’s all about knowing the right techniques and avoiding common pitfalls, so prepare to take your skills to the next level and achieve smoother results in your projects!
Key Takeaways:
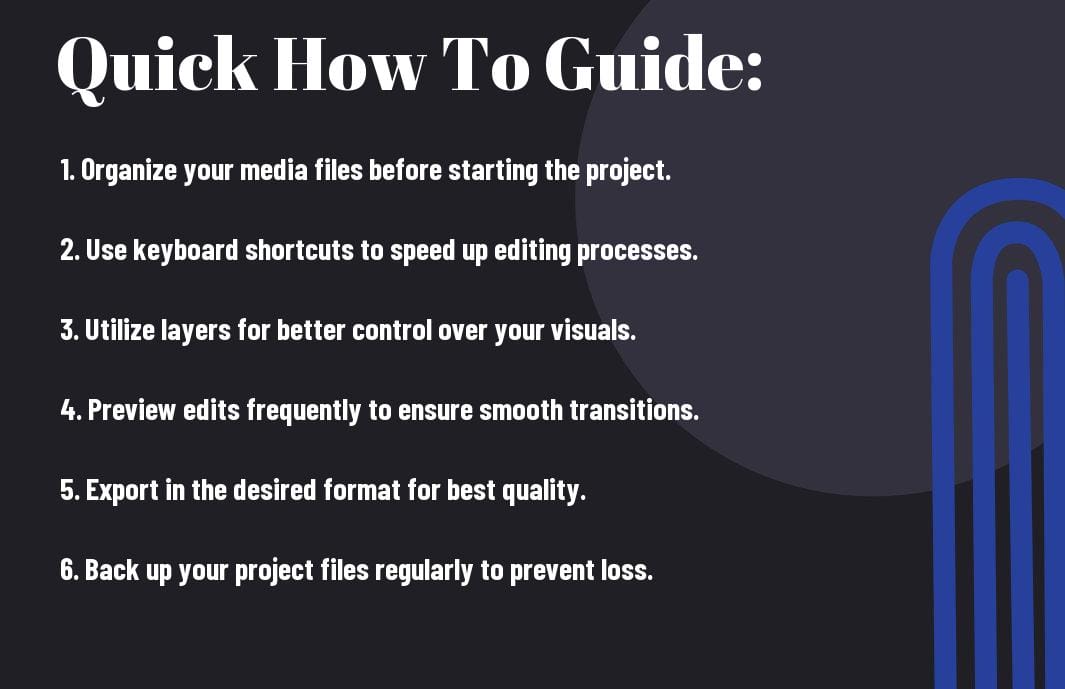
- Organize Your Assets: Before starting your Filmora project, ensure all your video clips, audio files, and images are well organized. This will streamline your workflow and make it easier to access and edit your media.
- Utilize Keyboard Shortcuts: Familiarize yourself with Filmora’s keyboard shortcuts to speed up the editing process. This can enhance your efficiency and make the editing experience more enjoyable.
- Preview Your Edits: Regularly preview your edits during the project to ensure everything flows smoothly. This can help catch any issues early on and save time in the final revisions.
Understanding Filmora
While navigating the world of video editing can be overwhelming, understanding Filmora makes the process simpler and more accessible for you. This user-friendly software is designed with intuitive tools that cater to both beginners and seasoned editors alike. You’ll find that Filmora streamlines various editing processes, allowing you to focus more on your creativity rather than getting bogged down by technical difficulties.
Overview of Filmora Features
If you’re looking for a powerful video editing solution, Filmora boasts an extensive array of features including drag-and-drop functionality, a vast library of pre-made templates, and easy-to-use special effects. These tools not only make your editing experience efficient but also enhance the overall quality of your projects.
Benefits of Using Filmora
Even as a novice, Filmora empowers you to create professional-looking videos with ease. Its intuitive interface and robust features allow you to execute complex edits without feeling overwhelmed. This software is perfect for anyone seeking to elevate their content creation skills.
Features like one-click audio normalization, advanced color tuning, and various export options ensure your final product meets the highest standards. You can seamlessly edit videos in different formats and resolutions, giving your content a polished edge. Moreover, the frequent updates to the software provide you with new tools and enhancements that keep pace with your growing editing skills. Using Filmora not only saves you time but also significantly improves your video quality, making it a valuable asset for any content creator.
Essential How-To Tips
It can be challenging to navigate through your film projects without proper guidance. Follow these vital tips for a smooth experience:
- Plan your project meticulously.
- Set your preferences before diving in.
- Utilize shortcuts to save time.
- Stay organized with folders and labels.
The more prepared you are, the better your final product will be.
Setting Up Your Project
To set up your project effectively, start by defining its scope and purpose. Choose the appropriate aspect ratio and resolution that align with your output intentions. Don’t forget to create a new folder to keep everything related to your project in one location, ensuring effortless access as you work.
Importing and Organizing Media
Little attention to organizing your media can lead to chaos down the line. Import your files meticulously by creating clear categories for video clips, audio, and images to establish a robust workflow.
Another significant aspect of importing and organizing media is to ensure you maintain a consistent naming convention. This practice reduces the risk of losing files or misplacing important clips, which can delay your project. Additionally, use subfolders to separate different elements, making it easier to find what you need in just a few clicks. A well-organized media library not only enhances your productivity but also conveys a professional touch to your project.
Editing Essentials
Your editing process is vital for creating a polished final product. Get comfortable with Filmora’s editing tools, as they can enhance your storytelling and improve the overall quality of your projects. Focus on trimming clips, adjusting color settings, and refining transitions to maintain the flow of your video. Familiarize yourself with the interface and shortcuts to boost your efficiency and ensure that your video captures the intended mood.
Utilizing Transitions and Effects
Transitions play a key role in maintaining the rhythm and flow of your video. Utilize Filmora’s diverse range of transitions to smoothly connect your scenes and enhance visual storytelling. Select transitions that match the tone and pace of your video to create a seamless viewing experience. Remember to use them sparingly to avoid overwhelming your audience.
Audio Editing Techniques
One of the most important aspects of video editing is ensuring your audio aligns perfectly with your visuals. Focus on cleaning up background noise and balancing audio levels to create an immersive viewing experience.
The importance of audio editing cannot be overlooked, as it significantly affects your audience’s engagement. Prioritize using tools like noise reduction and equalization to eliminate any distracting sounds. When mixing your audio tracks, ensure that your dialogue is clear while balancing sound effects and background music. Consider employing volume keyframes to dynamically adjust audio levels throughout your video, creating a more professional outcome. This attention to detail will elevate your project’s overall quality and keep your viewers invested.
Exporting Your Project
Unlike other video editing software, Filmora offers a user-friendly way to export your projects, enabling you to share your creative work efficiently. Before you finalize the process, make sure to review your settings carefully to ensure a smooth transition from editing to sharing. This is where the final touches of your hard work come together, so take the time to customize your output to fit your audience’s needs.
Choosing the Right Format
An crucial part of exporting is selecting the appropriate format. Each format serves different purposes—whether you aim to upload to social media, create high-quality videos for presentations, or optimize for web streaming. Align your choice with where you intend your video to be viewed for the best results.
Optimizing for Quality
There’s a fine line between file size and visual fidelity when it comes to exporting. You should strike a balance to ensure that your video maintains a high quality without consuming excessive storage space.
Format your video for various platforms differently. For instance, if you’re uploading to YouTube, choose a high-resolution format like MP4, which preserves quality while remaining widely compatible. Given that compression can lead to a loss of detail, adjust settings like the bitrate—higher bitrates equate to better quality but larger files. Always preview your video before final export to make sure the color grading and audio balance are intact, ensuring your audience views your project just as intended.
Common Challenges and Solutions
Once again, navigating through Filmora can present various challenges that may hinder your editing process. Issues such as lagging, crashing, or difficulty in exporting can be frustrating. The key to overcoming these obstacles lies in understanding them and applying effective solutions, allowing you to create your videos smoothly and efficiently.
Troubleshooting Issues
Solutions to common issues often include updating your software, ensuring your system meets the required specifications, and clearing cache files. Check for conflicting programs that may be running in the background, and consider adjusting your project settings to minimize heavy processing demands. These steps can help enhance your overall experience.
Enhancing Performance
Assuming you want to maximize the efficiency of your Filmora projects, focus on optimizing your system’s performance. This includes allocating sufficient RAM, utilizing proxy files for high-resolution videos, and keeping your graphics drivers updated.
With a few adjustments, you can significantly enhance your editing performance in Filmora. Make sure to limit background applications to free up your system resources and use lower resolution clips during the editing phase to speed up your workflow. Additionally, consider upgrading your RAM or using an SSD instead of a traditional hard drive for better response times. By implementing these strategies, you’ll enjoy a more responsive and efficient editing experience overall.
Advanced Techniques
All advanced techniques can elevate your Filmora projects, helping you stand out with creativity and polished visuals. Utilize these strategies to enhance your editing skills:
- Explore advanced color correction to refine aesthetics.
- Apply dynamic transitions for smoother scene changes.
- Leverage audio mixing for professional sound quality.
- Experiment with motion graphics for engaging visuals.
| Technique | Description |
|---|---|
| Color Correction | Adjust hues, saturation, and brightness for visual appeal. |
| Dynamic Transitions | Create fluid scene transitions with movement and effects. |
| Audio Mixing | Balance dialogue, sound effects, and music for clarity. |
| Motion Graphics | Add animated elements to tell your story more effectively. |
Incorporating Text and Titles
An effective way to convey information and enhance storytelling is by incorporating text and titles into your projects. Utilize Filmora’s various text tools to create overlays that engage your audience. You can choose different fonts, sizes, and animations, ensuring that your text complements the overall style of your video.
Working with Keyframes
Little by little, keyframes allow you to create dynamic changes in your video, enabling you to control motion and effects with precision. You can manipulate elements such as opacity, scale, and position to generate visually compelling sequences that captivate your audience.
Titles are a powerful element when working with keyframes. They allow you to animate your text in and out fluidly, adding a dynamic feel to your projects. By adjusting keyframes, you can create stunning effects where the text appears to float, slide, or fade. Don’t overlook the impact of timing—most viewers respond to well-paced animations, so ensure your titles enhance rather than distract from your content. With practice, you’ll harness the full potential of keyframes to make your text truly shine!
To wrap up
With these considerations, you can enhance your Filmora projects and streamline your editing process. By organizing your assets, familiarizing yourself with key features, and utilizing presets, you will save time and elevate the quality of your videos. Embrace the platform’s capabilities and continually refine your skills to create captivating content that resonates with your audience. Your journey in video editing can be both efficient and enjoyable, leading to impressive results every time.